Part One: The apparatus behind a traditional craft
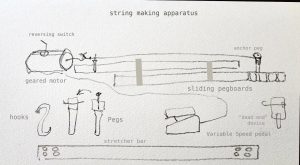
I have developed and adapted the apparatus I use to make silk strings over many years. Some of its parts are ordinary components; others are tools I made to solve particular problems. Together, they form a reliable system shaped by experience, experiment, and the practical demands of the craft.
This first installment introduces the equipment. The story of how I use it—and why I have arranged it as I have—will follow.
Silk strings are not simply a material wound into a finished form. Their result depends on the maker’s understanding of how these parts cooperate. This short illustrated preview introduces some of that equipment. It is a sample section for discussion, not yet a complete technical instruction: the captions will identify what the photographs show while leaving room for precise explanations of sequence and function later. My plan is to create a small book to share my experience and techniques, and this is a start.
This is the basic setup I’ve used for 20 years
The working apparatus
Some tools I made for myself:
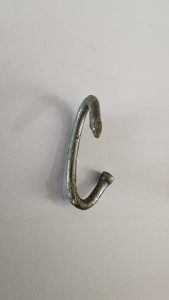
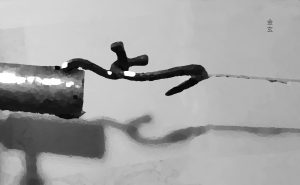
Hooks
Hooks made from finishing nail
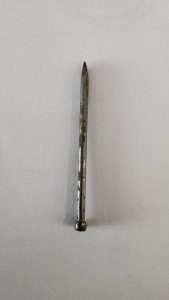
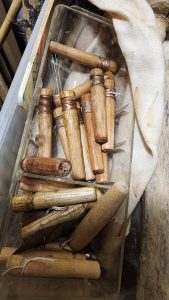
“Anchor” Pegs
The peg arrangement is part of a practical working system built around the maker’s bench. The pegs are handmade and adapt to different uses.
These pegs are wrapped on the end so a straight nail can be inserted to anchor a string. The wrapping protects the end of the wooden peg from splitting under pressure.
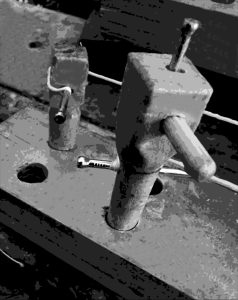
This is a basic “tuning peg” that can be used to add tension to a string while drying, based on pegs I’ve made for musical instruments.
“Tuning” Pegs
The nail can be removed from the top with the string attached, and inserted into the side of the peg. For big strings, I have added a wood dowel for more leverage.
I use reversible motors to spin the strings.
Some silk filature is spun sunwise, while others are the opposite. It makes a difference when many filaments are gathered for a specific gauge, and spun together. When plying a string, the direction of the plies must be reversed.
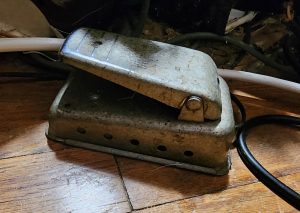
There is a variable speed pedal.
variable speed pedal
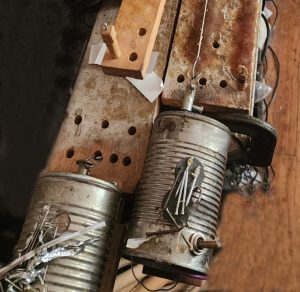
Geared Motors
The speed pedal is a variable resistor. It is a reliable way to vary the 12 Volt DC voltage to speed up and slow down the spinning while it leaves my hands free.
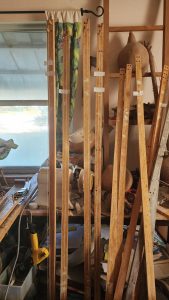
Stretcher bars with strings
My space is relatively limited, so I store my strings as they age, vertically. This also makes it simple to return them to my work bench as needed. You may see I mark the strings with basic notes on small attached papers about the gauge, and for whom it was made.
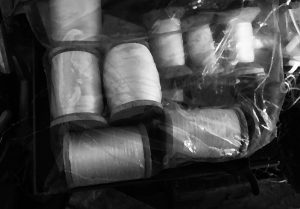
Spools of Silk Filature
These are the basic tools and some hints about my method. The book I create will go into much more detail about my “dance with silk” and how the strings are made suitable for musical instruments.
Let me know if this subject interests you in a comment.
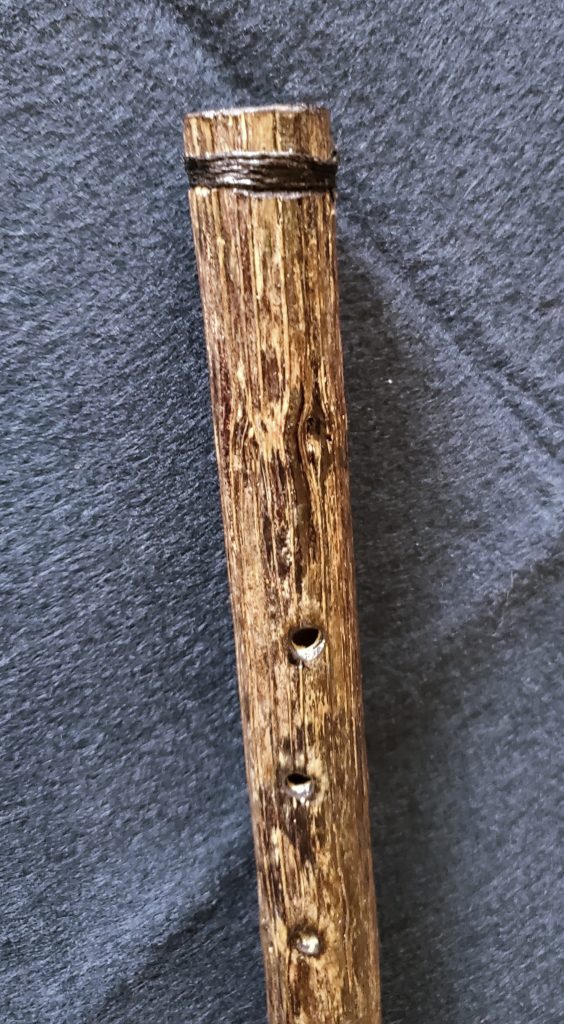
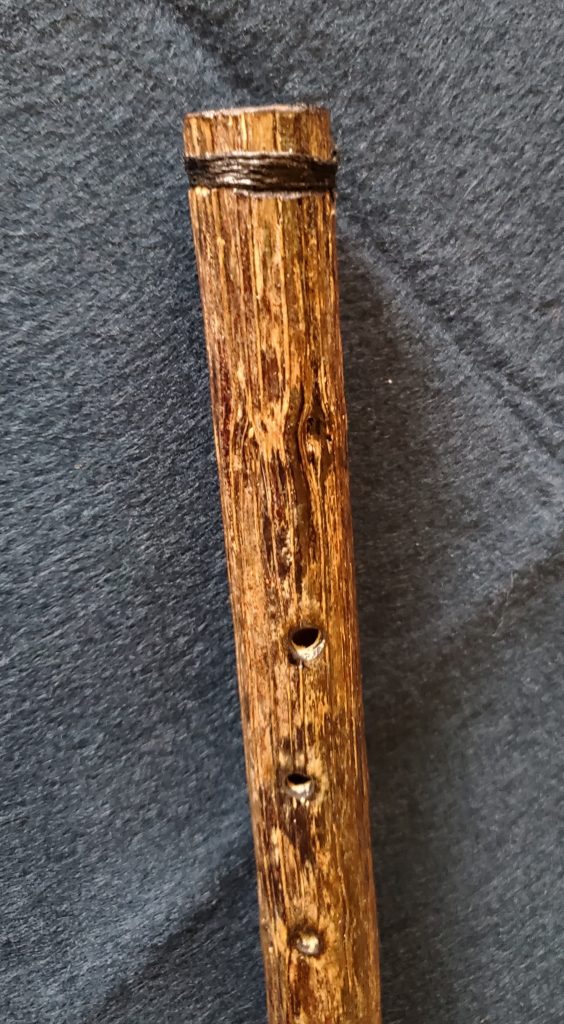
Is the size of the finger holes more important than the placement?
Mostly, that’s true. The length of the tube sets the lowest tone! That is your starting point. The first finger hole shouldn’t be too near the end, but not too far away.
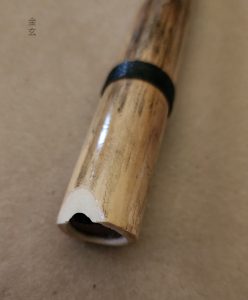
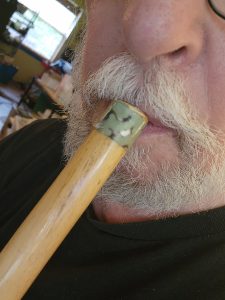
Shakuhachi style Embouchure
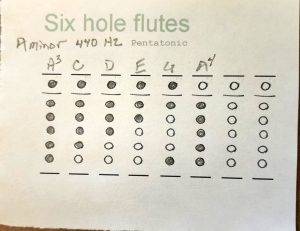
One of the characteristics of the Japanese Shakuhachi is the typical embouchure. that gives more latitude to the tuning inherent in the flute. By changing the form of your lips, as I mentioned in More About End-blown Flutes (an earlier post) and the angle of the blowing edge, an entire step, up and down can be achieved. Sharps and flats are a simple change of angle. The Fngering Charts I supply with my own flutes are primarily suggestions. Other fingerings can often be discovered.
These handwritten fingering charts can have extra columns for you to fill in.
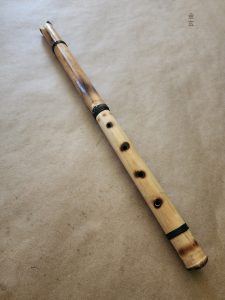
Does a Shakuhachi always have 5 finger-holes, with one at the back? Not necessarily.
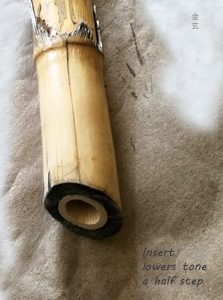
(This is an insert that makes the Shakuhachi embouchure more like a Xiao. It tends to direct the blowing edge in a more simple pathway. Some will find this helpful in gaining control of the breath at least at first.)
You will know when you open it.
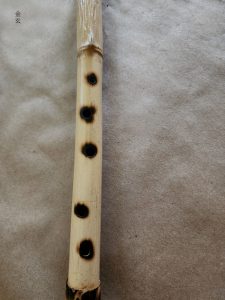
Start small and gradually open it. Generally, if you make a finger hole larger, it will sharpen the note. It may slightly lower the sound of holes below it. On five-hole Pentatonic flutes, a larger space between the holes will leave out a “note” to create a Pentatonic scale.
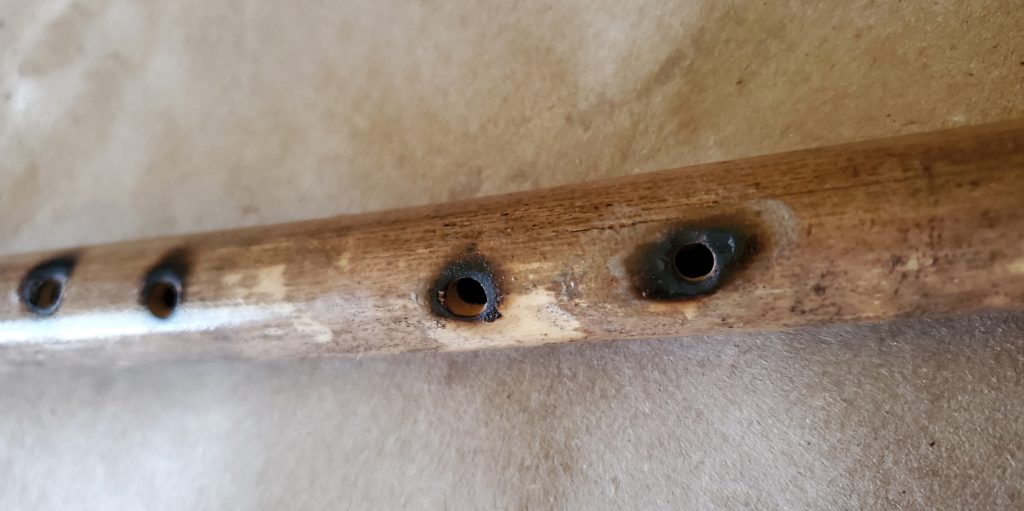
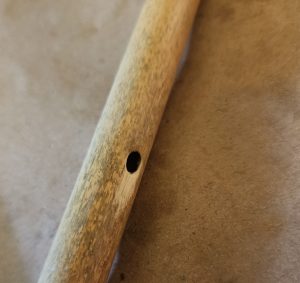
You may note that I use tools that cauterize the edges of the holes. Personally, I like the pattern and pyrography. I may go back to seemingly more “decorative” treatments, but at this time I feel the simplicity is good.
The holes from that point need to be comfortable distances (for your hand size) from that one. The real question is what scale do you want? Shakuhachi are almost always Pentatonic, right? So 4 holes might be enough, but usually there’s a thumb hole that helps modulate the second octave. (This is a secret few understand.) Or regard the first hole as the starting point, and don’t cover it.
Make it a first hole (can be out of your reach) close to the end and it can raise the lowest tone one entire step. Open that hole to go sharper until you get the base tone you want.
Make it a first hole (can be out of your reach) close to the end and it can raise the lowest tone one entire step. Open that hole to go sharper until you get the base tone you want.
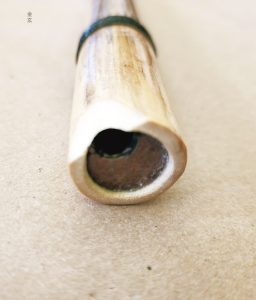
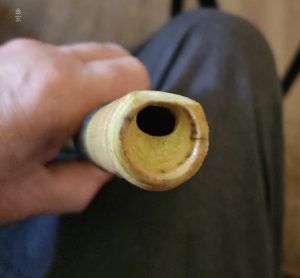
If you want to lower the base tone, you can lengthen the tube by inserting another section of tube. Or you can also simply restrict the end a little, and lower the tone a half step or more. I have noticed this narrow open end in some Shakuhachi. I surmise it creates a gentle backpressure and lends a resonance to the lower harmonics. I’ve gone as far as to plug the end with a thin fiber or wood cover, and gradually open it until the lowest note sounds right. Then, the course of finger holes can be opened one at a time and enlarged to create the tuning you want. This tuning is written in grass.
Essentially, however, the length (not the girth) of your tube will force a rough range of a particular tuning. A flute of a given length will have a base tone regardless of the diameter; up to certain point- if it is too large it may not resonate well at all. You may not have enough breath to play it! Or a longer flute will become an overtone rich tube, which { may cover in detail, in another post, perhaps “Overtone Flutes“.
You may override this range to some degree with the size of the finger holes you open.
What is the primary effect in tuning an openended tub? This is different from an enclosed whistle lik an Ocarina, or Xun, but the size of the finger-holes in both are primary. The distance from the end of the (longitudinal) Shakuhachi is secondary, and much to do with the reach of your fingers.
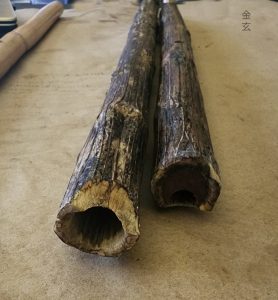
They have a pithy center that is fairly easy to remove. The stalks are porous. The big leaves attach at alternating points and sometimes leave little holes at their points of attachment that must be filled, too. I use a combination of Shellac and thin cyanoacrylate (CA) mixed with sawdust. Then I use a wirebrush to scrub the interior befor I pour the “superglue” down the bore. This reveals any remaining open cracks, because it does flow out, the exit points will then can be filled with Shellac. Superglue hardens very quickly, so it is not long before I can blow a little air through it, and stop the end to determine it is fully sealed. If the tube is not completely sealed to begin with, it will not resonate through the entire length. Probably you will not get a note out of it until then.
Next, the first notch is cut on the end and tested, blown again until the correct angle and fipple area is near perfect. I then treat the notch again with thin CA and let the pores absorb it and harden. This is exatly what is currently being done to “stabilize” some exotic wood burls, too.
The tuning comes later, and I will refer you to a previou post about tuning Shakuhachi.
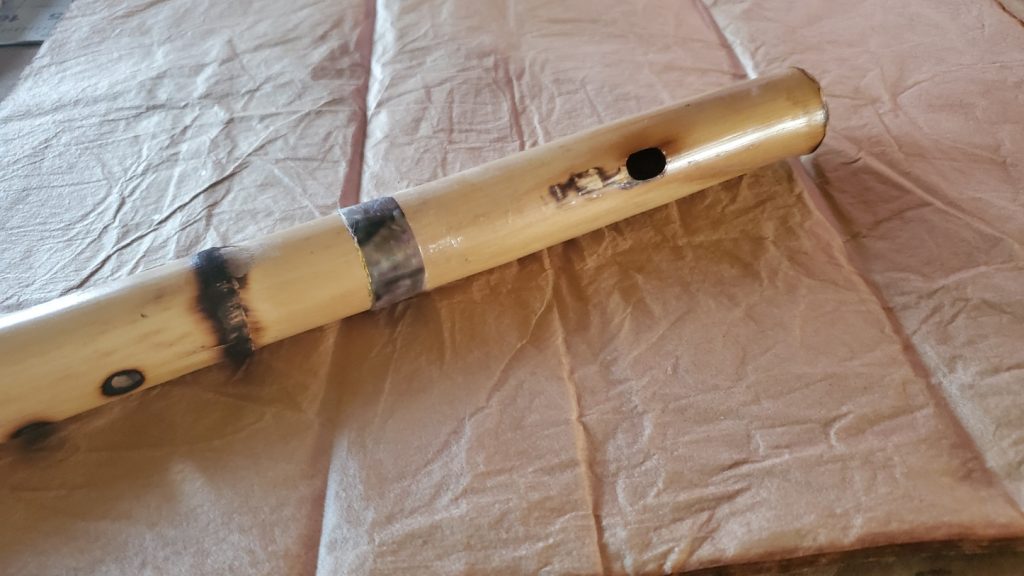
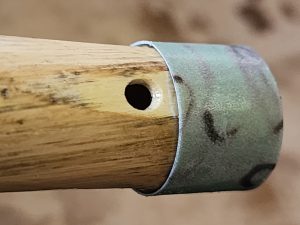
This Overtone flute is end-blown, with the breath diverted across an opening much as the Native American (NA) style of fipple (See previous post). I like to use a stabilized, printed heavy paper ring, in the place of a folded slip of cane or grass. I stabilize it with the same thin cyanoacrylate (CA) mentioned earlier, too. It is not glued in place, so it can be moved a little to favor certain harmonics. Or it can be removed entirely to be cleaned or even replaced.
The hole I prefer for the fipple (or sometimes called the sound-hole) tends to be oval in shape for most of my flutes now. Many people use a straight edge and this is common because it is said to produce a sharper sound delivery.
You can see the small gap in the ring above the fipple. This gap is really important to direct the air over the hole, and as I mentioned you can move it a little to direct the air more or less over the hole, which is undercut on the left, and a slight incline toward the right.
This is a delicate balance of the 3 features: the flattened ramp and bevel, the undercut and the ring that directs the air over the hole. When this is in balance, you will get a good sound from it.
The end is capped off, so the diverted air only blow across the hole, that starts the resonance in the tube. You play by modulating your breath from very, very soft for the lowest note, to more and more pressure to raise the harmonics. An open-ended flute can be directed to much higher tones by covering it with your fingers: more or less modulates the frequency.
fingers modulate the higher overtones
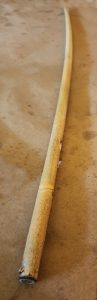
This is the flowering top of an Arundo Cane stalk. It is very long and hollow throughout. Seldom does it approach over a half inch in diameter, but it is very long and nearly hollow.
But the end might not even be open on some of the Overtone flutes. This does limit the range, but some finger holes may also be added above the end. There are many possibilities.
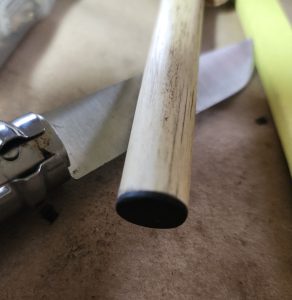
This is a piece of Ebony that closes off the end.
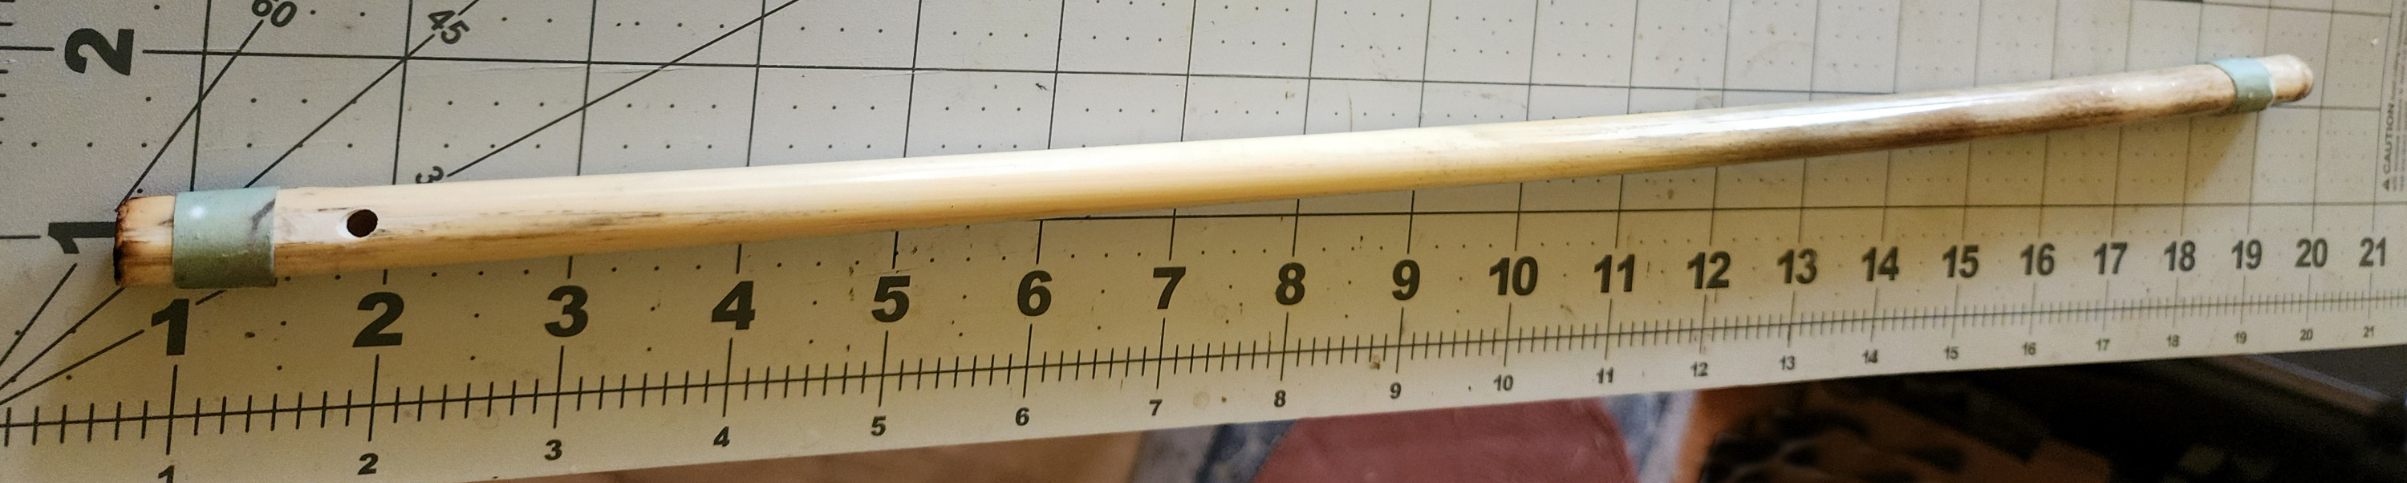
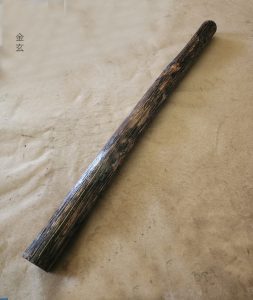
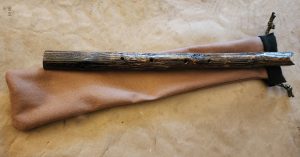
This is the full length of the flute. As you may notice, there are no finger holes on this one.
I often wait until the early hours of the morning to make recordings, but then there are the occasional outside sounds like this train in the night. Then sometimes there are birds and sometimes puppies, or then the slide of slippers in the hallway. These accidental inclusions can even become the subject of the music, simply serendipitous. Welcome to my way of thinking about music.
The strings are silk and my instrument there is a 22 string Zheng I’ve played for a few years. There are no ornaments as you might see on Guzheng. I will sometimes slip in an extra bridge or two because I need an extra tone there, and replace strings in the gamut for testing. The tuning here is probably the Ritsu scale I was exploring a couple of years back when I made this recording. Lately I have been more interested in Gamelon, but in some sense, I hear the two are related.
Ritsu scale: E F# G A B C# D
Pelog Gamelon Scale:D Eb G# A Bb C D
Slendro Scale: C D E F# G# A# C
I play improvisationally. I am capable of writing musical notation, but it seems a rather tedious thing for me to do.
I’m not as ambitious as I was 15 years ago when I played Theremin, Didjeridu and Tibetan singing bowls.
What I do is develop a theme and play it over and over again for days. Then try to shape the basic theme, rather like one might do a visual composition.
I have a very good memory for tunes, and I have always had a visual approach to music. My wife will attest to the fact that I can hear the opening notes of most music in public spaces and immediately identify it by composer and title. I see the shape of the music in my “mind’s eye” as some people say. So, I don’t write things down, but I do listen very carefully. I do use a DAW to record my work and use digital editing.
I see my own music as a series of forms that I perform on strings that I will tune in interesting ways. When I finish with a particular piece of music that I’ve recorded, I nearly try to forget what I’ve done, so I can move on to the next with a fresh approach.
Musicians interested to play flutes with a directed airflow might find my remarks helpful today concerning end-blown flutes without those details. I insist they are much more interesting because they have more expressive possibilities.
What is an end-blown flute? This is somewhat self-explanatory, but a distinction I like to make is the way air is directed over a resonant cavity. If there is a built-in passageway to direct the air, (as in Ocarina or Recorder) it makes the flute simple to play, but it does remove a large portion of the dynamics of breathing available. When the breath is directed largely by the lips and palate, and the various angles the flute is held against the mouth, the tonal qualities increase dramatically. But there is a learning curve, and to that area I would like to direct my thoughts for you, the reader.
“It’s fine that you are all deep into music. But there’s something deeper and if you would go deeper, if you go to the source of where the music is being made, you’ll find something even more interesting. At the source, everyone’s individual music is made. If you ask what the deep place is, it’s ur own life and it’s knowing your own life, that own way that you live.” — Watazumi Dōso, わたづみ どうそ) Roshi (November 20, 1911 – December 14, 1992) was a master of the end-blown Japanese bamboo flute. He studied Rinzai Zen, attaining the title of rōshi (老師).
Here are some examples of embouchures on different flutes. the bottom one is a Xun.
This is an example of an Utaguchi
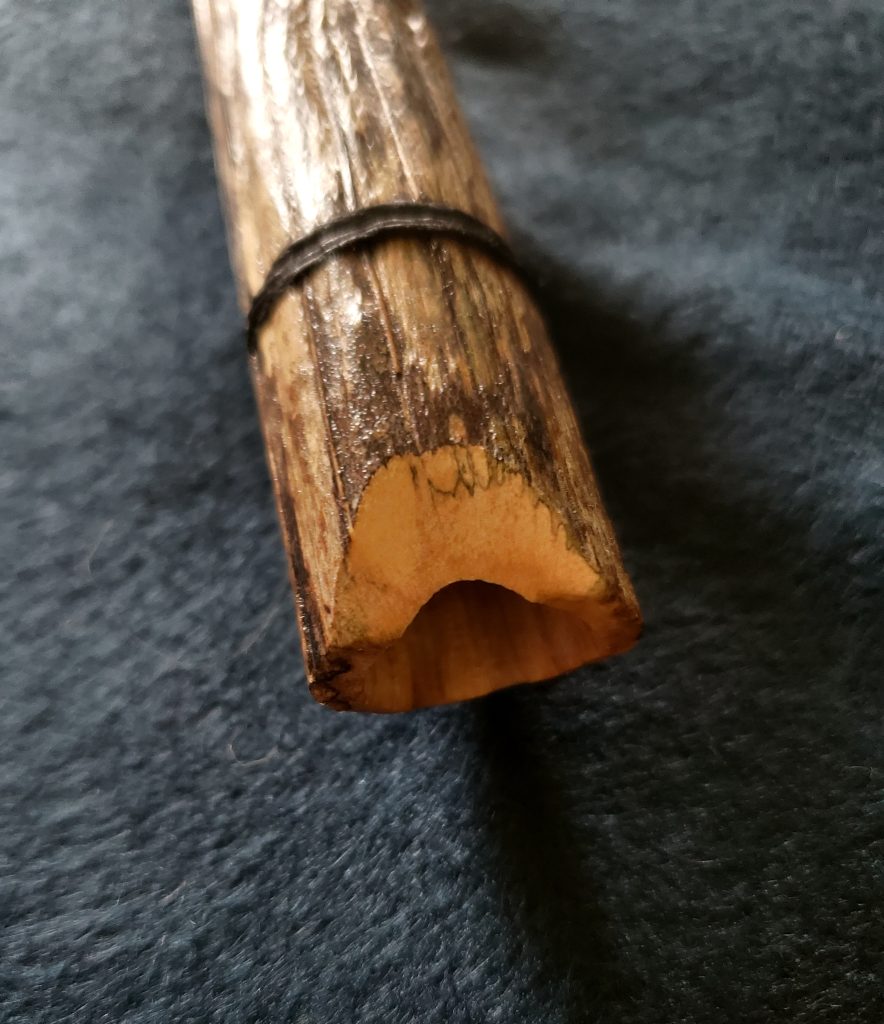
Shakuhachi is a traditional Japanese end-blown flute of a specific length, but often now this length is ignored and is used generically. The notch on the end is called the Utaguchi. We can use this for reference as to how to shape your embouchure, or mouth position.
What is the ideal mouth shape and position to voice an end-blown flute?
This is a fairly standard notch or “utaguchi” for Japanese Shakuhachi
This is a fairly standard embouembouchure
Each flute will present a different set of changes to your embouchure, and to hit the higher notes will often need a slight change of position and shape. No two flutes are alike, though they may appear to be the same.
Start out by blowing very softly. Remember that you are not only perturbing the air at the top of the column, but at positions along it there are harmonic nodes from the interaction of air and shape of the vessel. Sometimes just a little air is needed to activate the whole column.
When the openings are made for your fingers along it, they change the airflow. This is how the gamut of notes are achieved. Often the changes in your lips will be needed to reach the tones you require.
This flute is made in Arundo Donax, a type of river cane. The utaguchi is a little different, with a broader notch. The semicircular opening at the edge is also smaller. This requires a different embouchure to play it.
Finger holes
When you place your fingers over all the holes along the tube it becomes a simple resonant cavity. As you open each by lifting your fingers the resonance changes dynamically. Most often you might begin by opening the holes from the bottom, each in turn. But this is not always the case. Learn by experimenting that some notes are achieved by alternate opening of holes out of sequence.
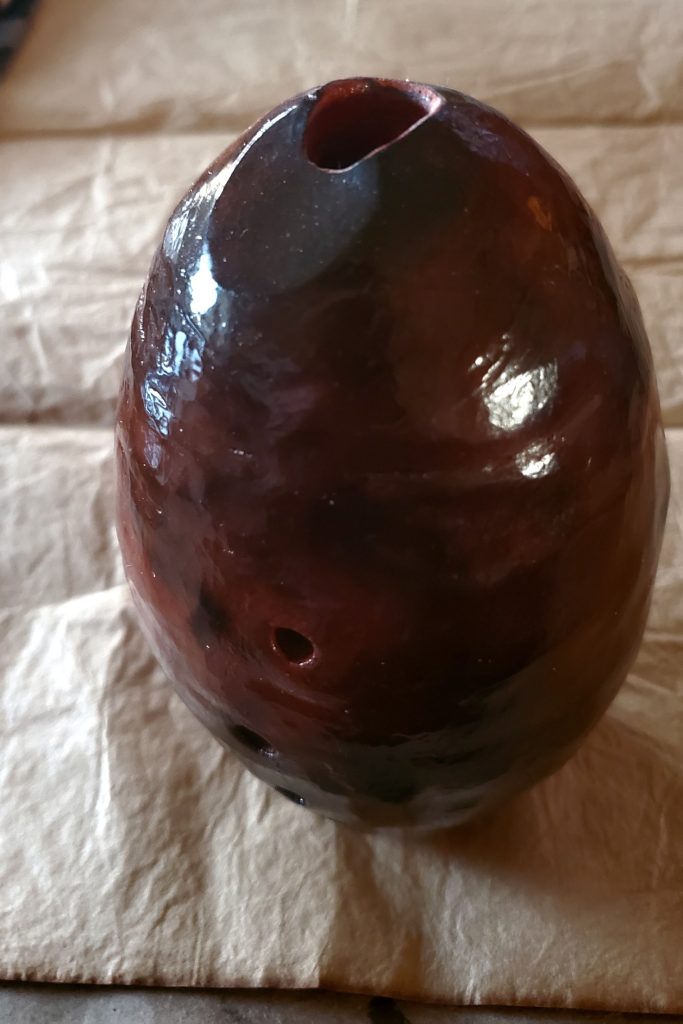
This is a ‘vessel flute’, or Xun.
Without the basic “training wheels” of an Ocarina you will need to shape your mouth correctly. Why bother? It will allow you to play much more dynamically once you learn it.
Since the vessel flute is essentially closed at the bottom, the dynamics throughout are rather different. There is a more cumulative effect overall. More open holes raises the note by amounts related to the air pressure released. There is no big opening in the bottom as in the Shakuhachi model we began with. You can change the pitch by opening more holes, somewhat at random.
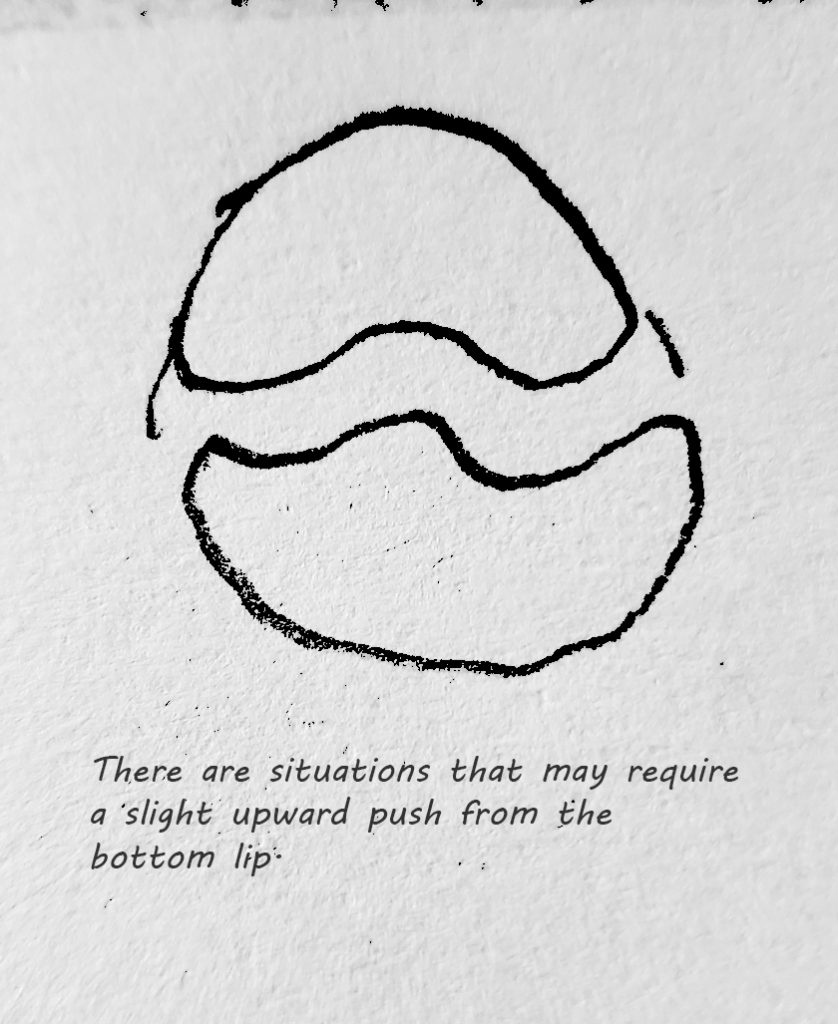
Here are some drawings to illustrate ways to shape your lips to achieve the tones you want. Learn to adjust these basic shapes for nearly any instrument you may pick up.
Remember that at certain points the opening in your lips might be more useful if they are not simply a flat oval, but the bottom lip may need to be forced a little upward.
Xun is a very ancient musical instrument, originally of clay. Is an end-blown wood Xun, a Xun in the strictest sense? Is a clay Ocarina strictly speaking a kind of Xun?
Xun is often presented as the “oldest” instrument, but several others could just as easily have that distinction, if ” first” really matters. Xun is old, old. Xun is primarily about Earth, to me, and as a potter, it becomes intriguing to make music with Earth.
Really old Bone flutes
What distinguishes a Xun from an Ocarina, to my way of thinking, is that it is an end-blown flute rather than one with a ducted airstream. A Recorder or Pennywhistle has built into it an ‘airway’ that directs the breath over the edge of a hole that “whistles”. Some refer to this edge as the ‘fipple”.
What’s going on with your breath that it makes a sound? It is the perturbation of the air as it passes over an edge, in an up-and-down manner at a frequency that causes sound. The air moves in waves made by this motion, and it causes sympathetic vibrations through the atmosphere to your ear canal. This is what you hear. It happens in your brain, due to tiny hairs in the ear that vibrate in resonance with the moving air and spark the nerve cells into action, to send a series of signals to it.
An Ocarina is a ducted flute with a fixed blowing edge, and a channel to direct the air.
This vibration of air also flows into any resonant cavity in close enough proximity so that more sounds are produced. I am speaking specifically in reference to the cavity of the attached column of air that is connected to the “whistle”. It could also be a nearby vessel that can develop harmonic vibrations to a lesser extent. All of these factors will have subtle effects on what exactly is heard. In the case of a flute, it is an open-ended air column. In the case of Xun, this is a closed resonant cavity. Either case, the musician who breathes into the air column might want to produce a variety of different tones. This is done by piercing the air column at various points. It causes different harmonics to generate in the resonating cavity or air column.
Theorists have often pointed out that he openings in a flute that change the tone are placed at mathematical intervals to lengthen or shorten the column of air, so that specific tones can be predicted mathematically. This is only a partial truth. Demonstrably, the size of the hole has as much to do with the tone as is the placement of it. I point out frequently, that either a Xun or Ocarina with holes placed in columns along the length of the resonating vessel can be tuned primarily by the size of the holes that one covers alternately to modulate the tone. A specific set of tones depend more on how much of the air is allowed to escape!
A Xun, seen to the right, has an opening that requires you to provide the correct embouchure.
A Flute, Recorder or Ocarina has a fixed system to ensure the preferred sounds are generated
On an open-ended column of air, the first note with all other holes plugged by the fingertips, is determined by the mass of air it contains and secondarily by the length. The vibration of the air column is modulated by more than one factor. So that if a hole is added to allow air to vibrate differently, it is more than one factor that determines the tone. If you place the given hole in the column at random, the tone will rise, and if the hole is expanded, that second tone is added to the primary tone and can be so adjusted. Keep in mind, also, that the entire container, ie. the ‘flute’, is also vibrating the air around it. It adds more than can be easily quantified without some very advanced monitoring equipment beyond the brain.
Another end blown flute that should be mentioned here is the
Transverse Flute, many examples of which are used in orchestras, but many simpler wooden varieties exist in many traditional cultures as well. In this example the opening is on the side of the column and also requires the musician to provide the correct embouchure with their lips.
In a closed air column, (such as either an Ocarina or Xun) the first tone generated is related to the size of the vessel, not entirely unlike the open air column of a flute. Both the air and the vessel vibrate together at the resonant frequency. (An irregular shape has some effect on this resonance, too) Add a small hole other than the vibrating orifice itself, and it will raise the tone if it is placed anywhere on the vessel. Ideally, you will place it where a finger can cover it. Expand that opening or add another and there will now be 3 tones available. If one hole is larger than the other, 4 tones become available as one or other of the holes are open. Add as many holes as you can cover with your fingers (or stop up with wax or something) and enlarge them until a full range of useful tones can be generated.
The End Blown flute has an advantage over whistles with “ducted’ air. The position and shape of the musician’s lips provides the direction of the airflow. This does make the instrument a little more difficult to learn, but it provides a flexibility to tone and resonance unavailable in Ocarina, Recorders or Pennywhistles.
What is the difference?
Here you can see the opening with a sharp edge. the embouchure of the Xun has an exaggerated flattened area for the air to pass over. This may be referred to as the “fipple” which is essentially the same as the Ocarina, except that the shape of the musician’s mouth directs the air instead of a built-in device such as seen below.
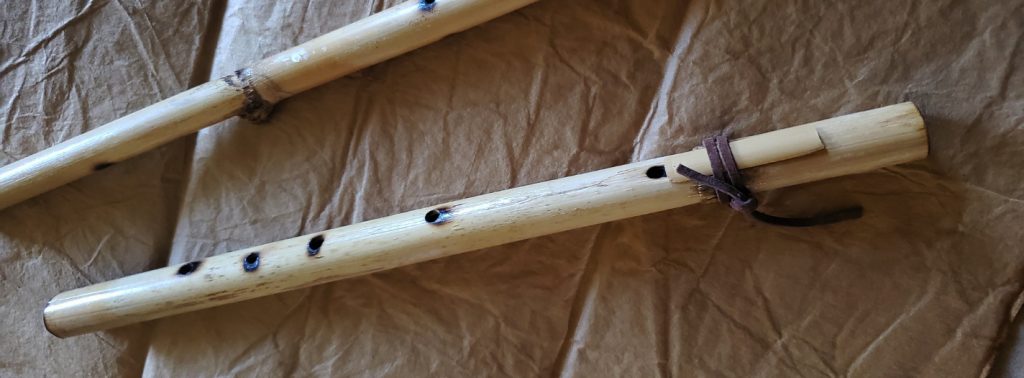
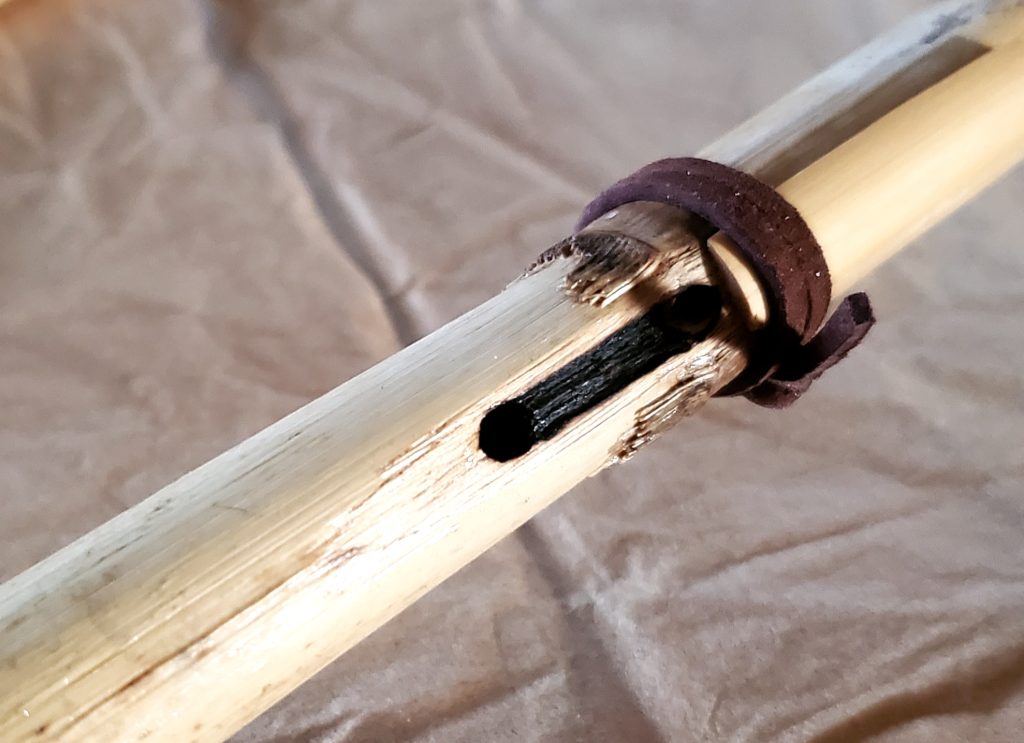
Above, you will see an opening with a little cover next to it to direct the air against the edge. It is held in place with a cord or lace so it can be slid closer or further away from it. The air is supplied from the end of the tube and redirected from another hole on the other side of a joint in the cane. This is essentially the way Native American and other tribal musicians build most of their flutes and this makes them quite simple to play. On contemporary NA flutes, a carving of a totemic animal figure is added as part of this “cover” or “block”. While it may inspire the player of the instrument, the effect on the sound itself is indirect.
Here you will see the cover slid back to reveal the little track that is burned into the surface to allow the air to transfer to the hole where the air begins to vibrate. Some will refer to this as the “sound hole” to distinguish it from the holes made to modulate the tone.
The amount of air available is carefully adjusted by the size, length and position of this track in relation to the sound hole. The placement of the little “cover” can affect the sound it creates in subtle adjustments. These delicate adjustments of airflow are provided by the shape of the lips and placement against the edge of the opening of a Xun. It is very nearly the same in many respect as for any end-blown flute.
Once these adjustments are in place, the sound produced is mostly locked in. This makes it both easier to play and also limits some of the expression. Blow a little harder or soft, punctuate the little blasts of air with the tongue or a sharp breath adds a lot. But in the case of pure end-blown flutes with the adjustments of embouchure entirely provided by the musician’s lips is an vast area to explore in the richness of tone available.
The angle, the tightness of the lips, and the direction of the air can produce tonal depth and even raise the tuning as much as the next note. Angle of the lips, the opening or tightness of your lips certainly sharpen or flatten the tone.
For the Xun, made of clay, there are a range of tonal characteristics not found within any other container. I know someone who produces Xun as well as Ocarina from wood (search for Michael Bretti). His instruments sound wonderful, and he plays them very well! But clay has its own voice with an added dimension that can’t be found any other way. Listening might be the only way to really describe what is there.
The beauty of a soft clay like Earthenware is, while vitrified and no longer susceptible to eroding in water, is still soft enough to be carved and the holes adjusted. It is like soft stone. Another characteristic is that the sound is very earthy, and not like glass. There are wonderfully low and high natural tones and overtones.
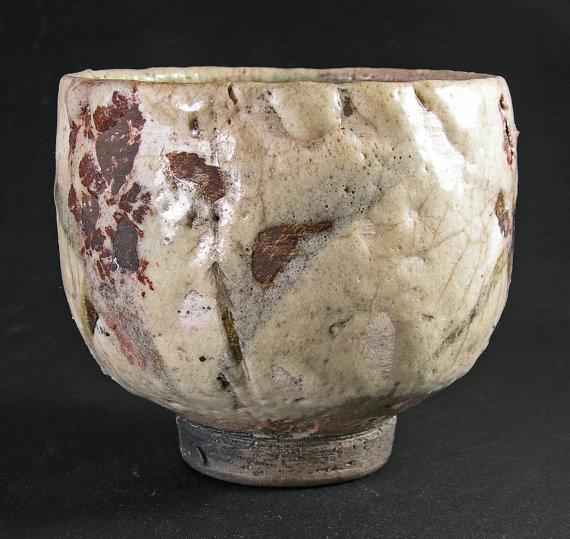
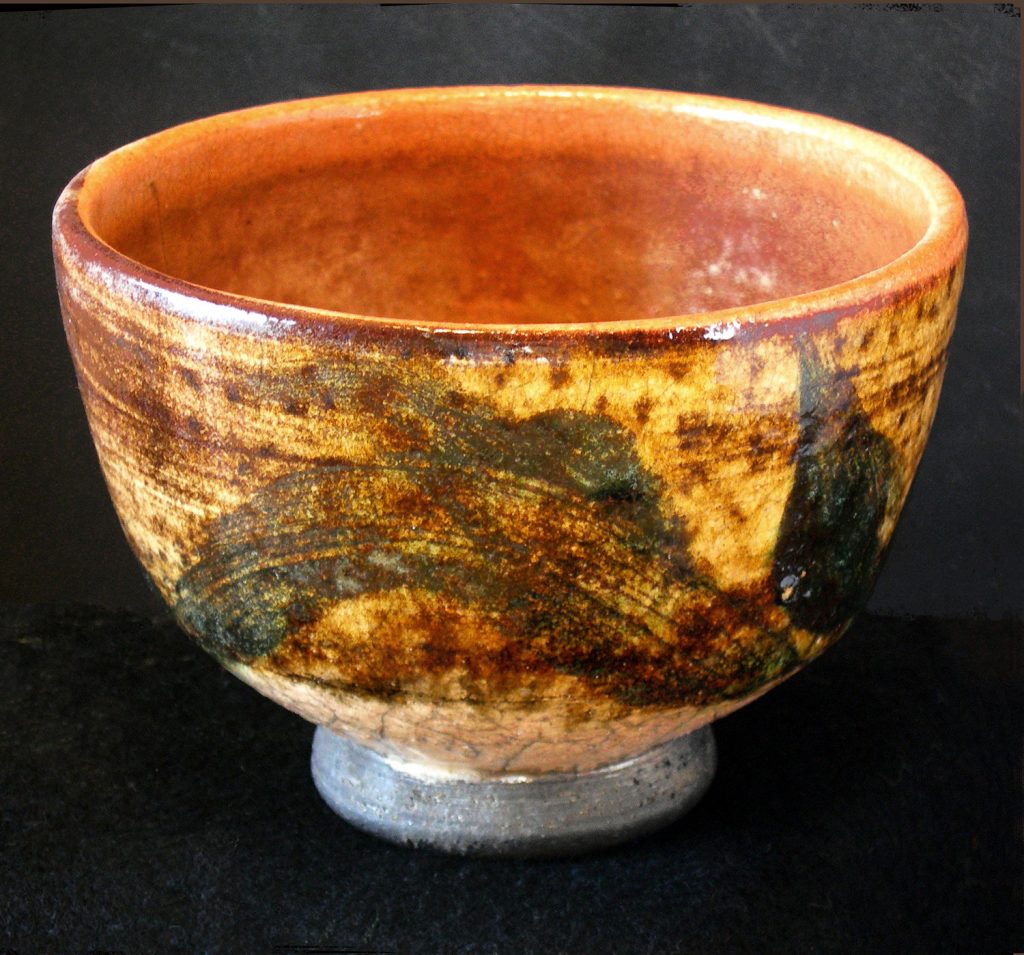
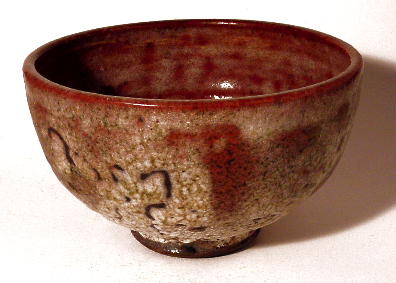
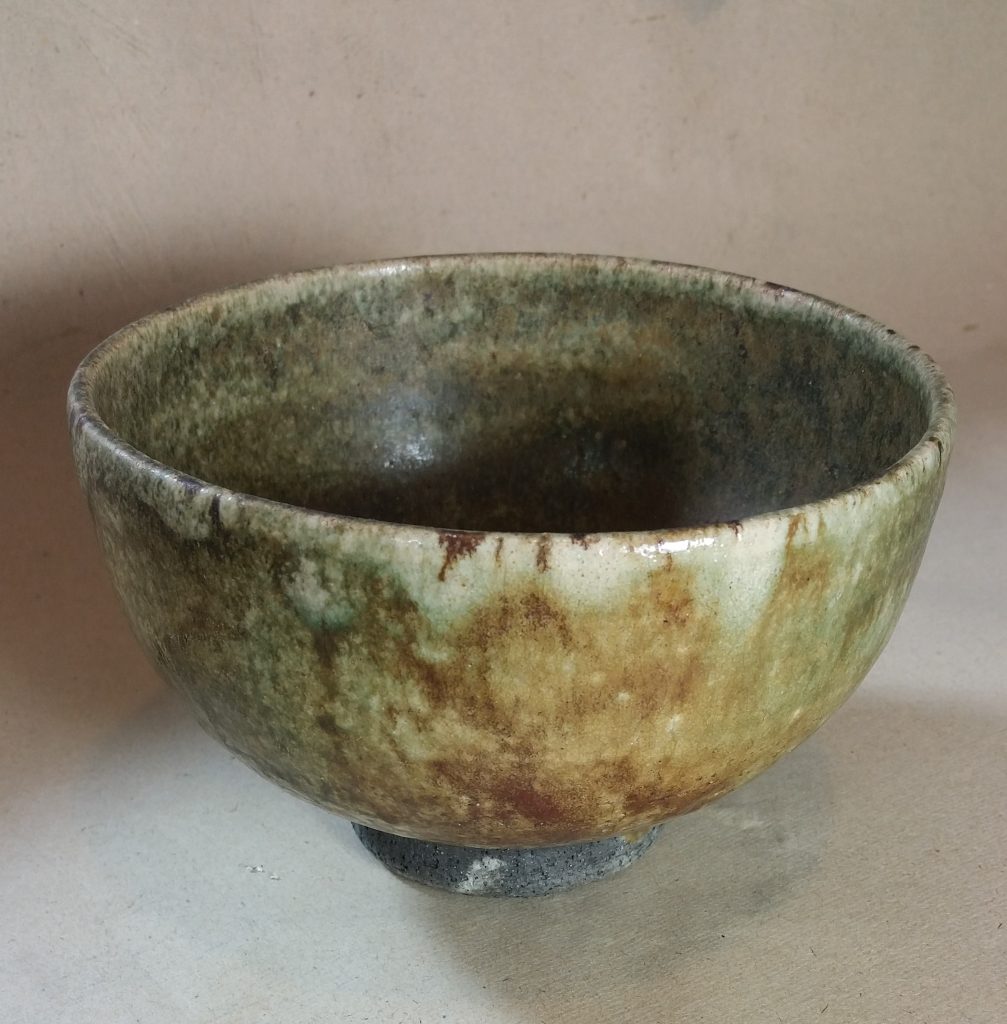
Tea bowls specifically for Matcha tea have many subtle characteristics that make them most suitable for the enjoyment of Tea. Over the last 60 years I have made and sold a variety of chawan and here are a few photos of these.
This is what I call “White Raku” ie. with a boracic glaze that appears on a white surface. I remember that in this example at the time I applied a white slip over a clay that would otherwise appear rather pink.
On this bowl I applied a red clay slip to create an orangish underglaze. The brushwork was done with a chrome oxide and burnt umber applied with a wide brush.
This is a squared bowl with green chrome oxide brushwork and a little umber pigment.
This bowl is painted entirely with a red burning clay I derived from the Oklahoma side of the Red River. The boron glaze is allowed to melt to a degree that forms bubbles and craters, and the opacity is simply due to these tiny melts in the glaze.
This bowl has the same boracic clear glaze, but it is allowed to melt until it is smooth. If left in to kiln to a greater heat, the glaze can become extremely smooth and shiny. I always preferred to remove these from the kiln at just the point that the smallest bubbles begin to form. This lends an opacity and soft white tone. This bowl is thrown with porcelain clay. Porcelain clay, due to the large particle size, actually makes a useful Raku clay. It’s actually like a heavily grogged clay of small particles and resists thermal shock. BTW I was doing this back in the early 1970s. I may have been one of the first to surmise this result.
This is a bowl with an underglaze of another glaze with copper oxide. The kiln is run with a lot of extra carbon from combustion. This allows the copper to form some dark greens instead of metallic copper, which I find to be incompatible with tea aesthetics. There are little bits of copper metal in places about the rim, which I feel acts more as an accent than an overexpression that is often expected by the uninformed when folks use the word ‘Raku’.
This recording started with an improvisation on my Zheng, tuned to Japanese Minyo scale. Then I layered it with a live recording of the tubular windbells in the photo below.
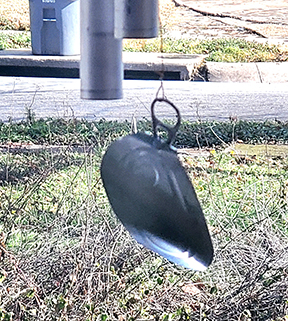
These are the windbells I have made, currently with bells tuned D4,Eb4,G#4,A4,Bb4 with an additional F#3 an octave below. I constructed it with hooks so that is is simple to replace or remove the tubular bells.
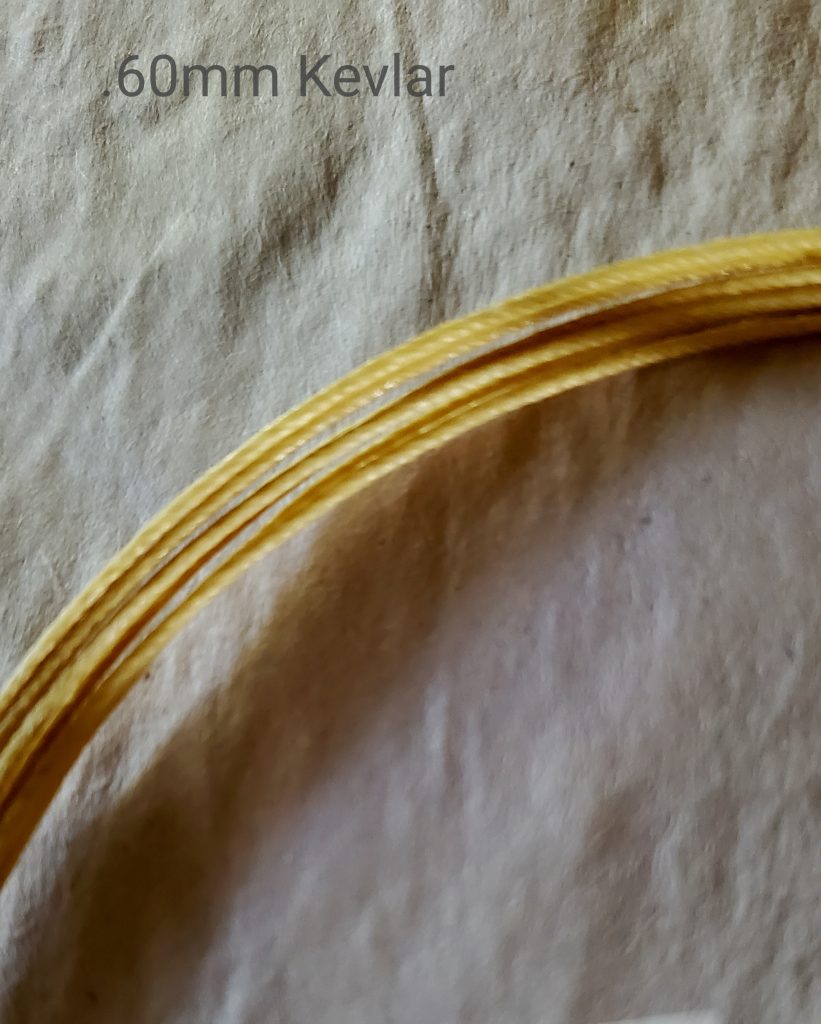
Each of the bells are suspended at the first harmonic point to allow the bell to sing at its best resonance. They are tested by holding them at various positions along the length, listening for the best resonance, and then holes are drilled and fitted with a rubber grommet. I use Kevlar cord for its resistance to abrasion. The bells are suspended below a canned chicken metal container, which I have in abundance.
The striker suspended in the center is a porcelain bead and the activator is the lid from a sardine can, twisted to act a bit like a propellor.
Here are some photos of the process of making the ancient clay musical instrument called Xun.
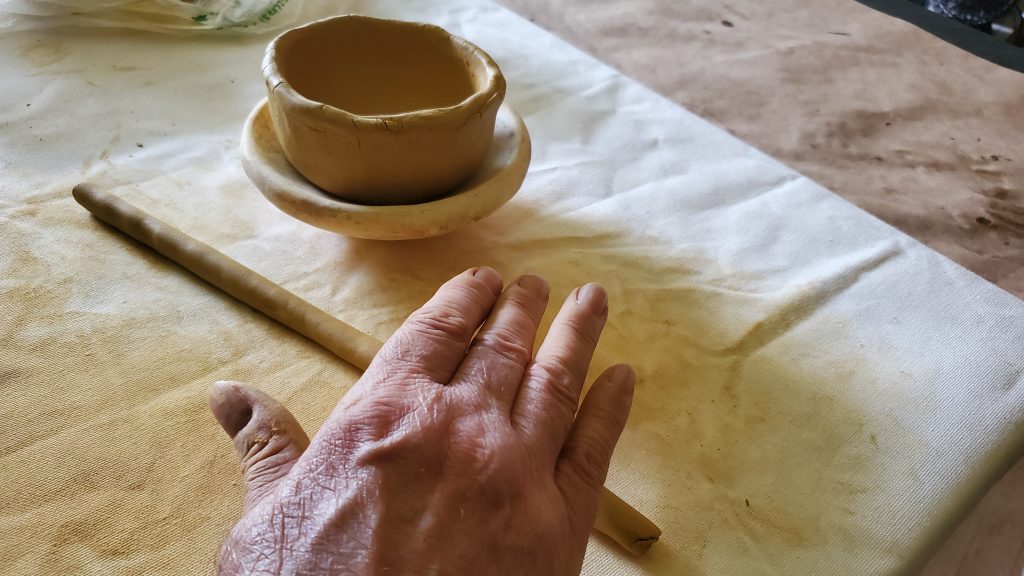
Rolling coils
Adding coils to the base
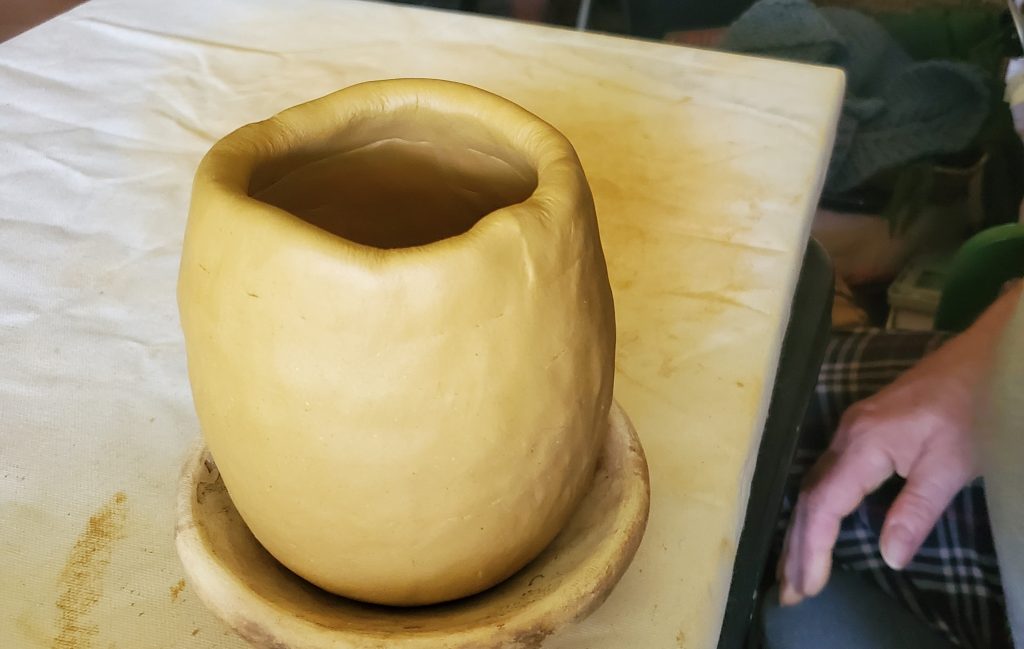
I Build up coils slowly, and form the mouth of the Xun
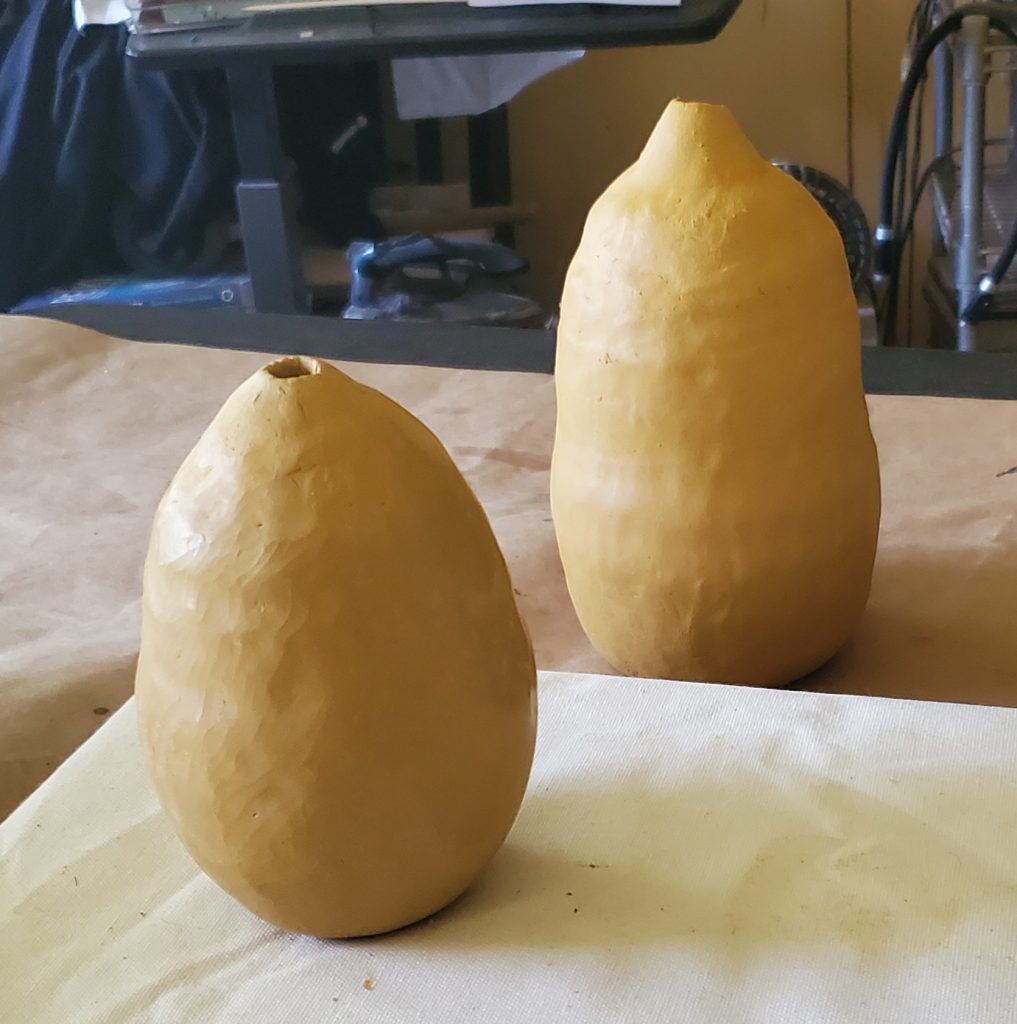
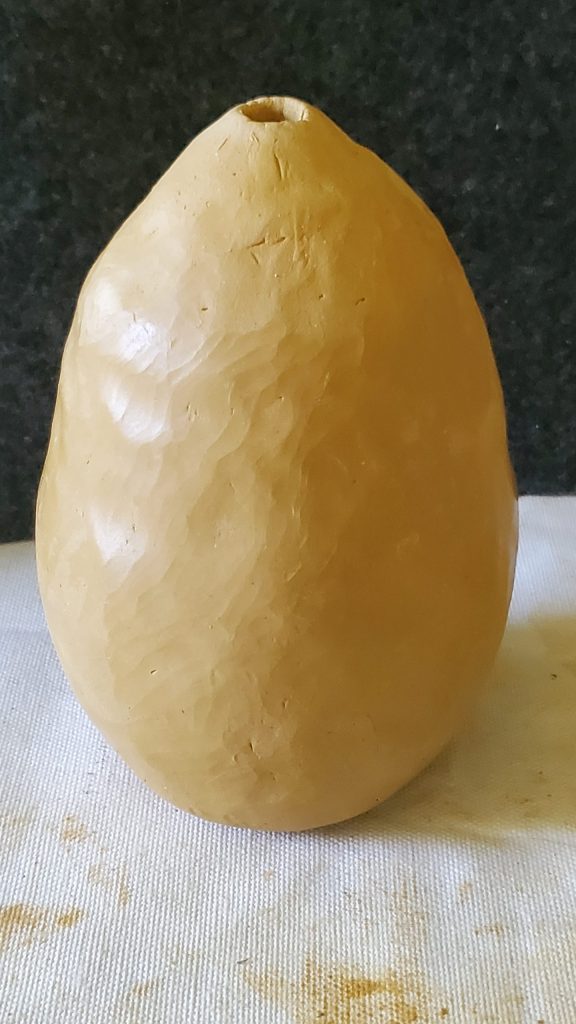
Personally, I prefer to let the surface show the slow work of my hands and fingers
Firing is an exciting process
Firing the Xun is done by simply setting up a bank of coals, then adding the pots after heating them on the perimeter to be sure they are completely dry. the next stage is to keep the heat very even and slowly raise the temperature so steam is formed very slowly. 212 degrees is the boiling point of water (212 degrees F) and at about 284 degrees F (140C) the chemically combined water begins to break free from the clay crystals. Beyond this point (at about 500 degrees F (260C) the H2O is driven completely out and the fire can progress quickly from that point. The essence of what I consider ‘Raku’ is a rapid firing that allows the potter to interact intuitively with the process. A long, slow firing is less likely to bring this level of focused attention.
The management of an open fire is a tricky thing and requires deep attention. This is where the element of air plays a role. An open fire is a very live thing. Kiln firing is simpler, of course, but a little more removed from the action, and controlled, so the results are much more predictable. Since I identify my work as ‘Raku’ the element of chance is encouraged.
After the Xun is fired, the clay is still soft enough that I can further shape the opening and refine the way it sounds. I can open the finger holes and tune it to preferred range of notes. I use lot of small files and can drill some new holes when necessary. Mostly 8 holes are quite enough; six on the front and two for your thumbs that I hardly use, myself.
Last month I bought a 2000X endoscope camera to look more closely at my Silk strings.? I find it very interesting to compare some of the fibers from different sources. To the left is a Chinese Bombyx Mori silk that was originally 3-plied and approximately .002 mm.
The fibers are said to be 7.84 microns more or less. (A micron is .000785 mm) A 1680 thread would come to about 10.34 mm, and we know this to not be the case. In fact, the way the fibers pack together is partly affected by their pentagonal shape.
You can see a single fiber of silk in the foreground here
Here is a small section of a set of wrapped strings. They are very neatly packed, while you can see the plies in the wrapping.
Here you can see a few stray fibers, too, that give a sense of scale to the wrapping.
This is what, until the addition of the 2000x endoscopic camera view I was able to offer as a closeup of my strings.
Saturniid moth? ? ?-Photo by Jean-Pierre Hamon
A closer look at burnished strings at .62 mm. These are of a wild silk, called Tussah, from Saturniid moths (see Antheraea paphia). I prefer this silk for Lyre strings.
Tussah is stronger than silk from Bombyx mori, the more standard silk for garments and Damask weaving. Tussah is a little creamier in tone and sometimes varies a bit in thread diameter so creating specific gauges is a little trickier. It does, however, look a little more “authentic” to some people when strung on instruments of antiquity.
You can see that the surface has been burnished to make them much smoother than they would be otherwise.
These are .62 mm:
Real Silk strings can be purchased in my Etsy store
I acquired several medium sized gourds a few years back, and slowy discovered how to best use them as I intended, to make musical instruments. Gourds have traditionally served as resonating bodies in musical instruments, either as the main body, or in the case of some Classical Indian instruments, such as the “Veena”, as a secondary resonator.
Classical Indian "Veena"
After the side has been removed from gourd
I must admit that as the instrument took shape it was difficult to limit the intention to one specific idea. I wanted to primarily make a standard Lute length instrument so I may test strings intended for Renaissance lute.
But soon after I began, a host of other possibilities came to mind, including sympathetic strings, which have always intrigued me, maybe an additional Bass string.
After the soundboard was glued on, I carved the sound hole to an appropriate diameter. I also carved a place for the Cherry wood fingerboard to be inset, an “ogee??? or lotus petal shape. I have been aging that Cherry for nearly a quarter century, in fact! It was a section removed from rabbet of a large picture frame I made in the early 70s.
I was trying out this little “rosette??? and found it muffled the sound a bit too much, so am playing round with the whole idea of making other rosettes from parchment.
The current arrangement of frets are equally spaced, not unprecedented but an anachronistic holdover by some accounts. The adhesive I used is quite easy to reverse if I change my mind later.
You might remember my electronic music, including Theremin from some years back. Some might notice I stopped recording about 5 years ago.
I have been focusing on an acoustic interest that goes back decades before I built my Theremin. I just didn’t have enough information. Or time.
Circumstances led me back to Chinese antiquities, and with a kickstart of information from a generous aquaintance or two, launched me toward some ancient traditional crafts. During the Chinese Cultural Revolution most of this silk tradition was wiped out. The pollution in China and lost memories makes it possible for me, and just a few others, to revive what was lost on a viable commercial basis.
Even the very best silk strings after more than a few years, will become a little hairy.
This is in fact the process that creates rich sound and subtlety. Use sparingly. Too much does dampen the vibration to an extent that treating the string with the right substance will maintain and extend their best sound qualities.
These strings have been played almost daily for two years.
The same strings have been treated with one of the pads infused with the extract of Bletilla striata- the Chinese medicinal, Bai ji.
Bai ji Pad
Stroke the individual strings in one direction; with the direction of twist- most often toward the Yueh-shan, or “bridge” where the strings are knotted, but this might not always be the case. Observe closely how the tiny hairs begin to reincorporate. If they pull further away, you are stroking the wrong direction. The inner layer of the pad will gently remove loose hairs. Regularly treating your strings will make them last longer and maintain their sound.
Making boxes …by hand begins with scoring the folds.
I use the tip of a burnising tool. This makes it easier to make sharp folds exactly in place.
I fold the tabs backward:
They will be inserted later.
The sides are folded upward:
A length of poplar wood is cut to the exact width of the box, and glued in place.
Glue is spread on 3 sides.
The end tab is folded in, and glued in place under the wood. The end piece is rolled over twice.
Then everything is held in place with pins until dry.
The Sleeve is a simple rectangle with a series of folds.
The Sleeve is folded around the tray to be sure it fits, then it is glued.
Though the concept is simple enough, to adjust the correct size of everything and print it exactly the first time, required several hours of adjustments. I print both sides of the tray.
The background pattern is a silk pattern from the Mawangdui archaeological find.
As you see. It is a perfect container for the Yao Staves as I described several months ago.
A customer contacted me recently and asked me to post a description of the way I tie my bundles of Yarrow. I was a little surprised, but it soon occurred that it may not be as obvious a sort of thing as I had assumed.
I thought for some time, that at least when someone received a set of Yarrow from me, they would simply reverse the steps of untying a bundle. But I soon realized that many would probably just slip the cord off the end, and leave a pile of cord on the table in front of them. If one had a sleeve, this tying, again, would be unnecessary of course.
It simply starts with a slipknot or lasso,
Slipknot
several turns; then a spiral to the other end.
Wrap around
Several turns then spiral back to the loose end and tie. -Bow knot, if you want to
easily untie it,
You can tighten it all by sliding the ends outward. (Sort of like a Chinese finger-trap)
I’ve been making flutes for over 30 years, but it is quite recent that I have a regular supply of Arundo donax -sometimes referred to as “oboe cane” -to work with. I have always planned to have my own stand of bamboo, but the way this Cane grows is less intrusive than many kinds of bamboo. The walls are thin, so even a small diameter has a proportionally large resonant chamber, and it is easy to work with. I think that’a part of the reason the Sui instruments are typically made of Arundo from the Middle East. I does not matter that I grow this grass in Texas! The quailty appears essentially the same. Orundo is a fast-growing plant that has minimum requirements from soil or water. For the Native Americans of this region, flutes were typically made from large reeds before the now generic Plains Style flutes made from Cedar.
It is useful to point out that the flutes now so widely appearing in Powwow circuits were probably not the kind the ancestors of the current population made. As far as I know, it was largely due to the efforts of Ben Hunt, writer and illustrator of some popular craft books of the 1950s that established the current tradition.
Native Americans often complain about the appropriation of cultural heritage, but many I’ve encountered are only vaguely aware of the European influences on their own conditioning, so an endless cycle appears to me, of them chasing the tail of our own cultural identity unaware of the European influences. To try and PURIFY our tastes and habits to conform to some ideal we have of who we should be is, to me, pure madness.
The practice of Geomancy originated with Middle Eastern shaman. One practice was to draw patterns in the sand to invoke earth energies. From these patterns a range of meanings became standardized. To this day there are practitioners in many parts of Africa. Translated from ancient Greek, Geomancy literally means divination by earth.
In Syria, in the thirteenth century, Muhammad ibn Khutlukh al-Mawsili constructed several instruments to aid Magi in divination. One of these was the Ilm Al-ramal, or later know as Ramala.
This interesting item is a set of dice on an axle. Traditional Ramala could be made of wood or metal. Each die has the numbered ‘pips’ from 1 to 4 and they spin freely on a brass shaft. I like to work with wood, primarily, so the only metals are in the fittings.
The cast determines either an odd or even number that generates the associated mystical symbol. One die has pips colored in red to be the root # for the cast.
One of my customers asked me to make a Ramala for him to match the Shaizi he purchased. As far as I could tell, no one else on the planet makes these to sell at this time.
So I set about finding the best way to make Ramala and within a couple of weeks I have made several in Ebony, and Olive wood
Some Geomancers like to use Ramala in pairs, so there will be two of each available. Or one might like to have a light colored Olive wood and an Ebony set as a pair.
In medieval Europe, a well-known magician and astrologer named Cornelius Agrippa developed sixteen mystical symbols from ancient shamanic patterns. Similar to the Taoist oracle, the I Ching, Agrippa’s geomancy symbols corresponded to the astrological elements, planets, and their associated crystals. You can access the meaning of the symbols through several Modern texts.
How complex a musical instrument is! Once I started this project, it loomed forth with so many steps I had never taken. New ideas about how to approach each detail came to me in my waking dreams.
I had been making strings for a customer who was restoring a Nykelharp and wanted to match some existing diameters and lengths. I was a little skeptical about how such large diameters and lengths might sound, but after I put them on my testing bench my eyes got big and I played them shorter and they rang sweetly. So, I said “I need an instrument with short strings, and what better than a nice, round Yueqin for that!”
It really began with some beautiful cedar boards that were intended for barbecue; used once and then discarded. They were in the Outdoor section of a local hardware store, being sold at a huge discount because it was the end of Summer. When I picked them up and strarted tapping on them I was very excited. They rang like bells! Or at least SOME did; others were better, some less. So I bought a whole stack of boards bundled in 3’s to sort through until I found the best of ’em.
Drawing the faces
Then I traced the biggest circle I could make using a length of wood as a compass as I have done for many years on canvas to make circle paintings. This would also determine the proportion for everything else.
This is from a beautiful old instrument made with boards much wider than might be available now. A beautiful restoration project:
It was probably this instrument that inspired me to make my own version’ with materials at hand.
The body of the instrument is built in much the same manner as a barrel; a series of bevelled staves are glued edge to edge and bound with a rope around the roughed out faceplates. Once the glue is set up, the rope is removed and any gaps filled and sanded. The wood is actually some wonderfully dried shim stock I bought.
This is how I carved the back. I left it thicker in the center, to allow more flexibility in the edges. When I shape the outside, the edges are thinned even further.
Once attached to the round box, it is carved to thin it and shape the sound. I like to think of the soundboards as something like the skin of a drum.
The face is carved a little differently.
The sound holes are reinforced by leaving some extra thickness, and the edges of the board joints act as sound bars. They are connected to an area that will support the bridge.
I use a carbonized finish I learned years ago from Ben Hunt. His illustrated books were published in the 1950s and were a Boy Scout’s go-to source. He suggested the finish could be applied by campfire with a little wax and elbow grease. I include the use of shellac to my own approach, and the combination of French Polish with carbon creates a hard and satisfying tactile surface.
The pegs I made have an extreme taper. At first, it was suggested they were a little small. In fact, this makes it possible to make tiny adjustments to the silk strings on this small instrument.
A new source of exotic woods has brought me renewed interest in the Zhang Shaizi that introduced last year.
I found some really fine Ebony and a nice little box to present them.
They were unique in that the ‘pips’ were not filled with red clay and wax that I had used in the past. It seemed to me a contemporary, minimalist approach with some appeal.
I also found some Kingwood with wonderful grain patterns. Kingwood is a form of Rosewood that is known particularly for this distinctive characteristic. It seems every appearance of Dalbergia has a different name!
Kingwood Shaizi
There are also some Olive wood pieces on which I burned the pips to create a better contrast. I’m still making little felt bags for them.
The more of these I make, the better they have become in terms of the polish and proportions, the variety of woods and markings.
There is also a small set in Cocobolo, another kind of wood in the Rosewood family. I kept them simple and small to fit in small hands.
Someone wrote while addressing me, and suggested they might like to attempt to make some Silk strings for their own use. I replied:
I would recommend, if you haven’t already, that you get a copy of the Yu-ku-chai-ch’in-pu translated by Jim Binkley and read the description of how to make silk strings. Then set it aside! As interesting as I found the construction notes, the playing techniques and tablature are the most useful parts of this book.
Available in my Etsy store
An engineer might have some ideas about how to work with silk, but one would do better to learn spinning techniques with other fibers and apply what you have learned to silk, as I have. To make musical strings is not the same as spinning yarn, but you will be possibly informed by your experience with other fibers.
Sources of the most appropriate silk for your strings might be the most challenging problem. I have several sources at this point, but keep leaning toward raising my own tiny makers. There is a wonderful little report about the possibility of a small industrial program of silk production, with tables and measurements that I found a couple of years ago. It is, however, specific to Texas soil and weather.
The next area of interest touched upon in the Yu-ku-chai-ch’in-pu concerns glue. As an artist for 50 years I had explored resins, glues and mediums and found Alexander Raykov’s application of materials I am already familiar with to be brilliant. He was, however, not making strings for qin, which I found to be a different kind of instrument altogether. The homespun notes in the qinpu of Chu Feng-chieh will also not avail you!
The reason for this is that, of all the available adhesives and resins available from Nature, cooked rice starch is great for low-duty joining of porous materials, but there are much better kinds of glue that are compatible with the Fibroin in silk. What I developed is very close to Sericin, the glue that holds cocoons together. I reasoned that millions of years of insect development would arrive at the most perfect glue, while the common rice starch left over from cooking food was simply a matter of human convenience! What I have developed is a glue substance that is applied to the long fibers as they are tightly wound together, and a cayslyst is then introduced to harden it just before it dries. In a matter of hours the glue shrinks the string considerably, and with the addition of DRY heat, at the melting point of the adhesive, the whole network is permanently bound.
A gentleman I met yesterday complained about how the Internet has changed the way commerce is conducted in the world today. After I listened for a few minutes, I briefly outlined my progress with online sales in the last few years.
I said that about 20 years ago I had it in mind to do something I had thought about since I was quite young, and that was to simply plant a small section of Yarrow, a simple weed that I had read about inthe Wilhellm-Baynes translation of the I Ching when I was in High School, a weed grows profusely in abandoned fields around Austin, Texas. Yarrow grows all over the world, in fact, but it was when we were visiting friends there that I took a few roots home and placed them in a patch at home. “Why do you want to plant those weeds in our garden?” Martha asked incredulously. I told Martha, “One day I’ll sell the stems of these plants to people all over the world.”
Yes, I had been thinking about this a very long time, in fact I had almost bought home root samples on several occasions simply because it is a wonderful medicinal plant on its own. The leaves are a wonderful, ferny, soft and fragrant tapestry. That it does, in fact, grow up in early summer into tall stems with simple, white flowers is a detraction for those who prefer a tidy, restrained, picturebook sort of garden. There are more colorful varieties, too, that one buys at the local nursery with showy colors and restrained growth, hybrids that will grow for a season and die in winter. They do not come back, and their stems are too short, anyway- for my purposes.
I consulted the Oracle years ago. “Will it be a good idea to plant Yarrow, to offer to the world for the purpose of consulting the Oracle, in the traditional way?”
The Oracle replied, “One day there will be instant communication of words and pictures. This will cause great good fortune, when the wise engage in honest commerce in open engagements.”
I decided to work a little bigger with these drawings on plywood. They will be boxed later, and I’m still working on the thousands of layers of French Polish before I even build them. The first of the series owes a lot to latter-day NA design, but I simply arrived at it by the same means of drawing out from simple geometric concepts. It has a lot to do with selecting the features that interest me, rather than any meaningful agenda. I have the whole world of multicultural design concepts to support me. The flat white gesso areas take on a warm quality under shellac. I believe the grain of the wood is so important, that a little slippage of the intense ultramarine blue into it has a dynamic quality. I don’t feel it is better if everything simply stays in place, so in the next one I definitely encouraged the movement of the ultramarine ink into the resin. Yes, I could tame the process into an anal hard-edged monstrosity, but the flow is certainly more intriguing. The new addition of Gold ink over a red “bole” drew into the next piece, one that I am still not quite satisfied with. I am mulling over the space between the outer ring with the small vacant triangles. On the one side, the edge may be too week, but I don’t want a strict connection with the inner area. I may opt for the rich black you can see in the next one. I’m very happy with the sketchy little lines that light up the center area – for me, at least. With the open wood areas and the sharp points the black Sumi ink neither separates or joins. So that may be a clue as to elwhere #3 will need to go. But I’m not pushing it. I have a lot more to do before I come back to it.
When a new discovery was made in a Bronze Age archaeological site of a thin gold “Sun Disc” there was a general excitement among friends. At the Summer Solstice this year, the Wiltshire Museum added this penny-sized disc to their collection found in 1947 at Monkton Farleigh, some 24 miles northeast of Stonehenge. My suggestion was that it and all other grave goods should, once examined in detail, be returned to the site!
It was then suggested I try to recreate the idea in contemporary terms. At first, I was considering several ways to emboss the design in metal, but found myself going into an entirely different direction.
I have done a lot with pyrography in the past. But I didn’t have the sense of drawing with fire until I invested in some professional gear. Then I began an entirely new body of work that started with a series of sketches on wood. The pen can be very finely adjusted for temperature, produces heat almost entirely at the tip of the pen, and a variety of pen tip shapes are available for different purposes.
As I began to gain a certain confidence with the tool I began to think almost immediately about color and its application to these wood surfaces.
So when I began to work on larger pieces, there was plenty of open space and the detail was also much simpler to do.
I then embarked on a group of five 6.5″ discs that left much of the “Sun Disc” iconography strictly in the background, and the lines to stand on their own. These little discs are somewhat related to a series of large canvases I completed in 2010, three of which can be seen at the Blue Cross/Blue Shield collection in Dallas.
The first piece convinced me that the pencil lines were important, too. I left them, and used color pencils to create yet another kind of linear element.
A sense of the enigmatic is important, I suggest, to keep the viewer returning, to see again if something was missed.
Still maintains a suggestion of quadrants and the presentation of Light. The gesso areas accentuate the quality of the Birch surfaces.
This piece incorporates Taoist talismanic inscription that suggests the movement of incense spirals, or a wreath of energetic flotations.
This disc has, more than the others, more if the suggestion of wood grain, so it became the ground for a more coloristic approach. The Solar quadrants still exist, but bloom outwardly and are then bound up by the painted edge.
There is still a great deal to be explored by burnt lines. Perhaps in the next series, some broad areas may be filled with fired areas to determine a kind of relief for painted areas. So far, the pyrographic lines seem a unique way of drawing.
I’ve been thinking about it for quite a while, that I need an instrument om which to test my longer Real Silk strings, so I combined a long-necked and rectangular design and tuned it to the common scale of the Chinese Yueqin, or “Moon Lute”
As I had only built one ‘necked’ instrument many years ago, there was much to learn in the process. Design innovations came forward as I selected a box to base my sound upon.
I actually began with the pegs, which I had been carving out of Vitex from the garden. Vitex actually carves somewhat like soap when green, then dries quite hard. I left the bark on.
I find the peg placement on the old Chinese “Moon Lute” intriguing, and graceful, so I placed mine at similar, ‘radiating’ angles. I presumed that this would make it easier to reach them, as well.
An Old Moon Lute
One thing for certain was the need to reinforce the combination of a very thin and light soundbox with the neck added to one side. In my earlier instruments, I had simply passed the neck through the box so that tension was primarily secured by it alone. The strings pressed against what was basically a drum, with the neck as a counterforce.
My concept of a thin wooden soundboard was cautioned by an earlier lyre I had built with an unreinforced wood face. The pressure of 8 strings applied considerable force to a small area, and the face was soon quite concave. The lyre still has a very sweet sound, but the shape is a little disconcerting.
So for my latest instrument, I provided some reinforcement similar to the strutting under a guitar face, and the bridge provided with a leg that reaches to the back.
The back is also reinforced against excess pressure, but is able to flex considerably in counter-point with the face. The box is meant to “breathe” as it is perturbed by the strings through the bridge, and being quite thin, does not get in the way of the sound of the strings.
I also passed a support through the lower part of the box to be attached to the reinforcing curve of the neck, and becomes the anchor point of the string attachment on the other side. These measures provide all the support for the tension of the strings and allow the box to be thin and very light. The finish on the very refined surfaces are French Polished.
The instrument plays very well indeed.
It is currently tuned G D g d, the traditional tuning for Yueqin. It is a little folksy and easy to work with.
How surprised I was last year to ship not one, but 3 sets of stalks to Maylasia, where I later learned a bio – epic concerning Marco Polo was being filmed.
When the series aired on Netflix I watched several episodes, but became impatient, finally and fast-forwarded through the rest to discover what scene or scenes they might appear. It turns out only the final episode of the first series had a quick scene with a Taoist Oracle declaring “The I Ching does not lie…”
Never mind the absolutely ridiculous declaration, but for authenticity ‘ s sake, would ‘ he better use the term “Yi Jing” and show a few more moments of how they would be handled? So I was disappointed with the whole series, except for the last few scenes of Mongols sitting around their encampment playing Horse Fiddles (Morin Khuur).
 You will know when you open it.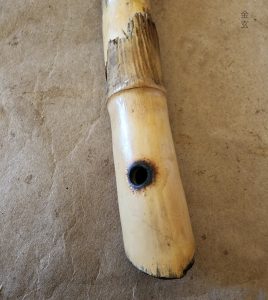
 If you want to lower the base tone, you can lengthen the tube by inserting another section of tube. Or you can also simply restrict the end a little, and lower the tone a half step or more. I have noticed this narrow open end in some Shakuhachi. I surmise it creates a gentle backpressure and lends a resonance to the lower harmonics. I’ve gone as far as to plug the end with a thin fiber or wood cover, and gradually open it until the lowest note sounds right. Then, the course of finger holes can be opened one at a time and enlarged to create the tuning you want. This tuning is written in grass.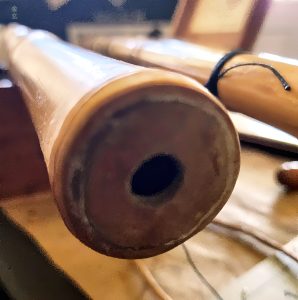
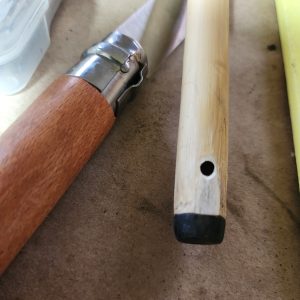 The end is capped off, so the diverted air only blow across the hole, that starts the resonance in the tube. You play by modulating your breath from very, very soft for the lowest note, to more and more pressure to raise the harmonics. An open-ended flute can be directed to much higher tones by covering it with your fingers: more or less modulates the frequency.